Showing posts with label Shapeways. Show all posts

Wednesday, April 10, 2013

Star Marine Heavy Armor Assembly and Review Part 1...

Well as I said I was really waiting to do a blog about my Star Marines.  Now I'm going to do this as a review of sorts.  Yes I know it seems stupid to be reviewing my own work but it’s necessary.  I’ve had a lot of questions about print quality with shapeway’s miniatures so I thought this was a good time to address that issue.  Also I felt it was a good time to address some of the ways we have to handle Shapeways products that is different than traditional miniatures.  So hopefully you’ll be getting an honest critique along with some lessons learned to fulfill your plastic addiction.

OK so first off, packaging and shipping.  I ordered these miniatures on March 31st at around 8 pm and they arrived Tuesday April 9th at 2:02 pm according to the packaging slip.  That's a Sunday and there is a weekend in between so that's roughly 7 business days to print these models and ship them to me from Shapeway's New York facility.  Realistically they probably shipped out the Wednesday or Thursday after I placed the order.  I'd call that pretty good turn around considering GW ran out of Dark Vengeance boxes day one on release and it took almost 3 weeks to get more stock to my local game store.  Ironically Shapeways sent a little apology note to me because they think 7 business days is to slow.  I really applaud Shapeways for their standards of service here.

The box is a sturdy cardboard box and the product is completely wrapped in large bubble wrap.  No bubble mailers or flimsy card stock packaging.  Inside the bubble wrap everything is in its own thick zip-lock polybag.  Nice little resealable bits containers for those who want them.  I use them for partitioning out models my wife sells on ebay. 

I will say I'm not sure how larger items ship.  Plastic miniatures in a baggie seems fine to me but two pieces of metal jewelry sliding across each doesn't make me feel good about the finishing.  I'd hope they bag metal items individuality and wrap larger items directly in bubble wrap before bagging. No idea though because all these are small scale parts and I'd say good packaging for what I ordered.

Here we have the gravity hammers and torso's in bag.  Sorry for the glare, the polybag is about 4 or 5 mil thick and glossy so its hard to get a great picture.  Shapeways actually sorted all these bits themselves, my model simply put them in the smallest amount of space possible so clearly their people are good at their jobs.

They packed the legs, shields, and backpacks together.  Torsos, legs, and backpacks were all hollowed to lower the price a bit. Even though they are hollow they are still quite sturdy and all survived the printing process without problems.

Everyone's favorite, shoulder pads.  These are just generic shoulders, no iconography.  But they turned out well enough.

Here are the arms sprues. I chose to make sprues for the arms rather than loose bits because the hands are extremely small and I thought they might get lost.  this is also the only place we see any breakage.  A couple of hands and arms came off sprue.  Because the parts were in the bag i'm guessing this happened in shipping.  Specifically the break point was the sprue where it joins the base of the part.  This was a 1mm diameter wire that was supporting the weight of the pieces and no damage was done to the bits themselves.

Ok so here we are getting into the interesting shots.  I've removed the bits from their bags and washed them (not shown).  I've ordered these miniatures in Frosted Detail.  Frosted Detail and Frosted Ultra Detail are essentially the same material.  FUD has a lower possible thickness and a slightly lower minimum detail than FD but thicknesses below .8mm are extremely weak in both materials making them very brittle.  As a result the price for FUD can’t be offset any farther by thinning and still have a model that won’t break during game play.  Ultimately it comes down to the minimum detail, 0.2mm vs 0.1mm doesn't sound like a lot and I’ll argue isn't enough to justify the cost of FUD over FD.  I have more opinions on print materials I’ll cover later on but basically keep in mind the cost difference is more for the printing time that it takes to print in FUD than for the actual material costs.


Photographing Frosted Detail is like trying to photograph an ice sculpture.  It main body is transparent and it’s outer surface has a white “frost” to it making it hard to make out detail.  In these photograph’s I’ve increased the contrast so you can see a bit more detail than the original unedited photo.  

Here we see the Shield and Backpack design.  You’ll note the raised plates on the shield’s face have flattened out a bit during printing.  Each step of the plates is approximately .25mm because the minimum detail is .2mm for FD its hard to discern exactly where the levels change, they are still noticeably different levels just a little flatter than originally designed.  This detail loss is minor but worth noting, I’ll be pointing it out as I go along.

The backpacks are much more detailed because their surface changes are much larger than the subtle rounding of the shield.  The only real loss of detail is in the vents along the sides of the pack which have filled in during printing. this is because I didn't make the vent's surface deep enough to really pop out. If you are using FD for making masters for casting your surface detail will be very important to you and sadly this lose, while minor to me, might be deal breaker.


Here we see two parts, the Torsos and the Hammer. The torso’s are hollowed out so they have a more transparent quality than the other bits.  The inside of the torso is a hollow bubble that I’ve put holes in the bottom and sides (shoulder mounts) on headed torso’s I also do a neck hole.  You’d think this would make the model fragile but it’s actually quite sturdy.  Think of it like an egg, structurally the force applied when squeezing the torso is spread across the entire surface making its crush strength much higher.

The detail on the torso turned out quite well.  You can clearly see the joins along the ab armor as well as the ribbing on the power cables.  Some detail is lost along the top of the capsule.  It's hard to make out in the photo but the square visor plate that is in the center of the capsule's face is almost totally gone.  this is caused by two things. First if I go back to my 3d model I can see the square's raised rim is extremely shallow, I can't get a clear measurement but it is probably below that 0.2 mm detail level.  Secondly you can just make out slight lines going left to right along the surface, this is the print grain of the model.  The printer head orientation gives all 3d printed models a grain and sadly that grain has caused some loss of detail.  It happens and can mostly be avoided if I had made the detail deeper to begin with.

Frosted Detail’s plasticity is lower than the ABS plastics used by most miniatures companies that do plastics but it’s still higher than most resin products.   That means it will flex rather than break most of the time but it’s still brittle enough that if you step on it, it doesn't so much smoosh down as it does shatter like glass.  I was particularly worried about this issue with the Hammer’s handle.  The thinnest part of the handle is 1mm exactly so it’s right on the line of minimum wire detail.  However the hammer, both head and handle, turned out quite well.  The lines on the head are pretty crisp, the detail on the hand grip of the handle filled in slightly but over all this is a symptom of me again designing to close to the 0.2mm minimum detail thickness.


Ah the legs.  I won’t deny I’m a bit of a leg man and I’m quite proud of the quality of the legs on this design.  Here we see the photo’s of the design’s legs so you can get an idea of their quality.  The hollow in the legs here is not uniform and has trapped raw material inside the leg design. The result is these bits look a lot whiter than the other bits.  The surface texture of 3d printed materials isn’t smooth.  In the case of FD and FUD it leaves a white frosted glass sort of texture but this is slight enough that very little detail is lost in printing (provided we mind the minimum detail levels).  The legs surface have nice subtle curves as I intended.  You can clearly make out details like the thick cabling and the hydraulics on the caves.  I’ll count these as the best printed bits so far.


The arms, these are the only parts I put on sprue and the only parts that “broke” during printing.  As you can see several hands fell off the sprue, I have them I just didn’t bother photographing them here.  One piece of advice, don’t sneeze around these bits.  FD and FUD are much lighter plastics than traditional ABS and ABS is already pretty light.  A slight breeze sent the hands flying and a strong blow made the legs hit the wall of my living room.  Luckily I lost nothing but bare that in mind when working on these.

Anyway, all the sprues are 1 mm and they warped a lot.  The hands are the smallest pieces of the actual figure, each knuckle is 0.7 mm, they are quite well defined and you can see the definition in the fingers. Sadly the photos of the hands are blurry because my camera hated photographing tiny white objects.  I believe because of the backdrop it was confused.  You can roughly see the shape of the fingers in the photos thanks to some contrast manipulation but they are there.


The whole lot of figures and weapons waiting to be assembled.  No real detail in the pictures but it gives you an idea of how big this lot of plastic is.


Once I had cleaned and photographed everything I went to work assembling.  I've modeled my designs so they assemble in much the same way as GW’s miniatures do.  Waist ball joint, neck ball joint (if a neck is present this doesn't have one), and a flat arm joint on the torso. My arms have a round joint so you can sand them flat at various levels to make different arm positions.  I've assembled my first Star Marine in a fairly generic pose and mounted him/her on a 40mm base.

This photo has no contrast manipulation or anything like that going on, it’s simply under the work lamp on my bench.  Thanks to the lighting you can make out some of the detail on the miniature but just barely.  You can see the gritting on the hammer head, the segmented plates of ab armor, the raised rim on the shoulder pads, etc.  Everything goes together smoothly and apart from pinning the hammer and sanding the shoulder joint on the arm to make a flat surface I’ve not manipulated the figure.  


A side by side picture.  Though really dark, the figure on the left is a plastic space marine terminator from games workshop, shown for scale only (painted as an art lesson by a friend).  The Star Marine in contrast is much taller than its counterpart.  About 8mm at the top of head, 3 at the top of the back icon.  That’s a pretty big difference and one that is a systemic design flaw on my part.  I know from my measurements that the torso’s and arms are completely correct scale wise with other figures.  The Star Marine is just to leggy.

I had this trouble with my original Female Marines as well. Basically I’m human accurate on my anatomy which means the legs aren’t foreshortened like most 28mm figures. The result is they are just to tall compared to the rest of the body on the table top.  I need to revise the legs to make them shorter.  That alone should bring the model into line with other 28mm figures, though an entire rescaling might be in order.  Not sure, tweaking is always a battle.

One thing, the figures aren’t bad for 28mm but they would be closer to being a “true scale” soldier than I intended.  I’m not sure but I might make two separate lines, one “true scale” one “heroic scale” depends on demand and how much work it is to maintain both.


Side by side the GW Termi is much chunkier than my Heavy Star Marine.  The position of my figure's head would be above the Termi's which makes it a bit awkward like standing next to a pro basketball player and trying to reach the top shelf.

I also had another concern with the figure which will likely prompt a design change.  The Hammer's main handle survived printing without issue but then was to small for me to drill and pin. Maybe i'm not coordinated enough but it proved to be a bad idea to drill a 0.75mm hole in a 1mm plastic rod.  I opted instead to remove the 1mm handle body and instead drill into the 1.5mm grip and pin directly to the hand.  I'm considering the idea of redesigning the hand and hammer, and probably a lot of weapons, to eliminate this wasted handle all together.  Possibly going to hollowing the handles entirely so they fit over 1mm or 0.75mm brass rod.  This would make the weapons a bit cheaper and make the models easier to assemble. Its also something that casters can't do easily that makes sense for 3d printing.

I've done a light drybrushing of flat white paint onto the figure.  It allows you to see some of the detail that was obscured by the frosted surface.  A trick of the light means that the white turns gray here so the gray spots are the highest spots, raised edges and such. Most of the figure has nice clean edges but you can see that the face has a sort of horizontal grain that just shows up in the wrong spot this time.  There is also a light pebbling everywhere that's about as noticeable as the soft pebbling found on metal models. After painting it generally disappears.

Wide shot of the figure under better lighting.  You can see the white on the surface of the translucent white figure.  A bit more detail is visible here but more detail will be visible once the figure is fully painted.  I really can't stress enough how hard it is to photograph translucent white models with a 10 year old digital camera.

My Thoughts
Well quite obviously I must admit that I have some kinks to work out with my modeling.  Its must easier to scale a weapon than a human figure.  The inconsistencies of the figure jump out a lot more on printing than a slightly over sized sword does.  Weapons and other bits like that are much more subjective and can be less accurately scaled than a body part.  I also need to make detail elements larger to insure they show up correctly. This is an extension of the same problem I had with WSF but its much more manageable at this detail level.

I also have to say that FD and FUD aren't perfect materials.  I'd like to see materials with a lower minimum detail and a more crisp surface texture than the fuzzy frosting on these materials. I've also seen a lot of home projects that appear to turn out better detail on materials and some projects like wax and photo resins can print at much smaller details.  FD is the best price point though which makes it at least passingly acceptable.  If shapeways is listening do a kickstarter for a higher resolution 3d print material for a lower cost. In fact, start several kickstarters one for high res material, another for 3d wax printing for molding capabilities, and another for actual 3d printing of RTV mold products, and maybe one for adding automated spruing for models uploaded.  Anyway point is FD is the best we can get right now balancing price and material availability so I will have to live with it.

Ok so that's it for now, don't worry I'm not done yet. I'm going to assemble these guys and paint them up so you can see the quality. As I paint the models I hope the detail will pop out better. Till next time, enjoy...

Sunday, March 3, 2013

Update, 3/3/13

Wow its been a while since I've updated my blog.

I've been focusing almost entirely on a series of commissions I've received which will be cast in resin for production.  I'm rather close to finishing those commissions so I've started dusting off some of my work to get back on the bike to ride as it were.  So I thought i'd jump on and say hello to everyone again.  I truely am sorry I haven't had anything fun to show off but hey, I gotta do what I gotta do.

If readers have checked my shapeways store they may have noticed that I've still been adding a few items now and then.  For those who haven't I thought you might like to see some of the stuff I've put up.


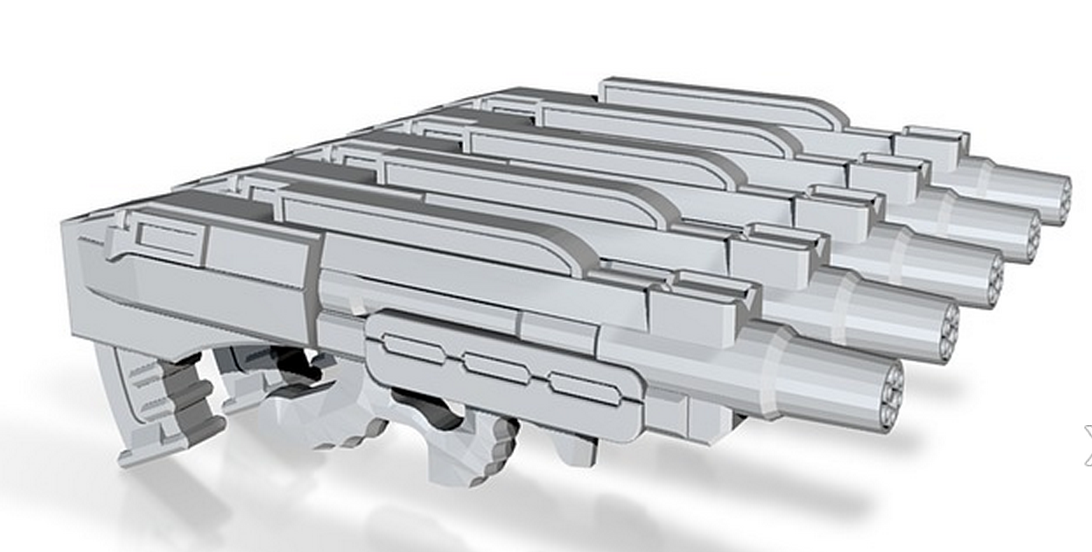
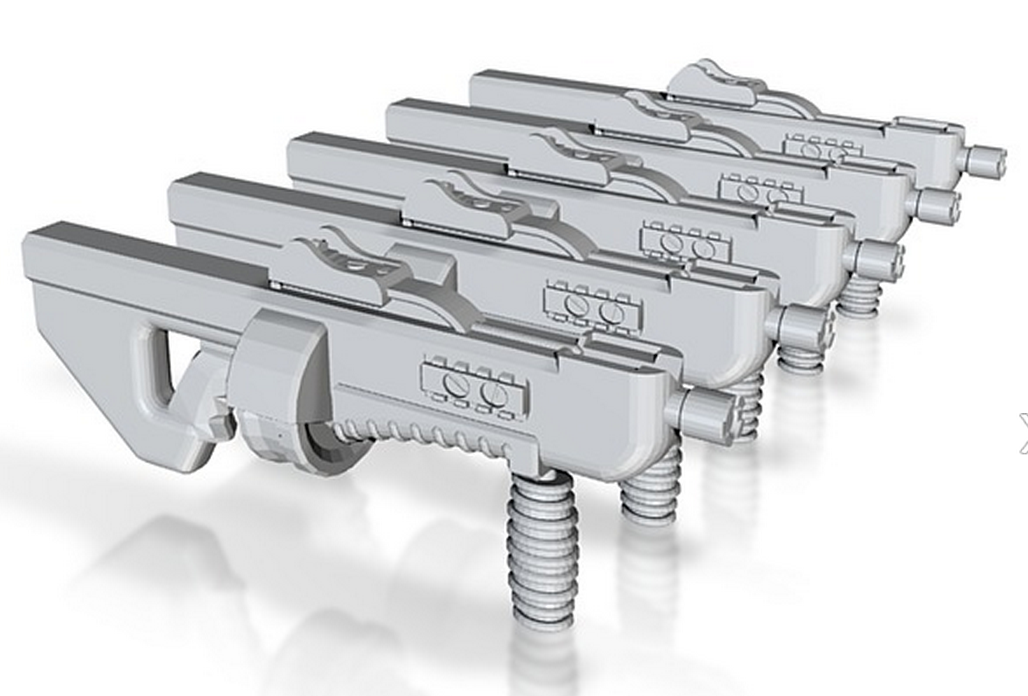
Months back I started revealing my "Advanced" weapon line which focuses on a sci-fi weapons for 28mm scale.  Those of you who have seen my increasingly expansive line of weapon designs might be intrigued to know the weapon base I use wasn't my first design for the base.   My early designs were a bit more out there with some inspiration taken from various sources.


My earliest design was inspired by weapons from several scifi properties.  Specifically Mass Effect and Star Trek.  the weapons in those properties always have a bit more technical look to them. Like they are made with more attention to detail.  Its a bullpup design with an under-barrel stabilizer.  This design featured a strange, flash suppressor which I was never particularly happy with. Even this earliest design featured the over barrel expansion port structure I would use in later projects.

At some point I fell in love with the idea of a micro gatling gun.  A multibarreled rotary weapon that  would fire micro missiles.  The main inspiration for this design came from playing a very old shooter, command and conquer renegade.  It also has design motifs from the FN-P90 and the Thompson Sub-machine gun. 

This design started as inspired by the FN-F2000 and the FAMAS F1.  Both cutting edge weapon designs for modern militaries.  The design shifted from there.  Its become a far more elaborate weapon.  It's appearance is nice and light with a technical design.  My main reason for not using it as my base design is it was simply to difficult to modify the design into multiple weapon types.


I have a love hate relationship with shotguns.  The short range, the heavy recoil, the small magazine, the inaccuracy.  When I do the math personally I always come up with a bad equation.  But I won't deny in other hands they can be fantastic.  Especially modern shotguns like the Pancor Automatic shotgun.  brutally effective at shredding cover and enemy flesh the pancor inspired me to make this design.  Unlike a lot of the other designs it doesn't have the underbarrel attachment mount. Instead it has traditional side rails for accessories.  The design is heavily rounded and smoothed like the entire weapon was made out of a single piece of carbon fibor.  In a scifi setting I picture shotguns as being the quickest, cheapest, and easiest weapons to make, even automatic ones.


When I started this project I had a good idea that I'd be making conventional weapons and energy weapons.  I first sought to make a separate energy weapon base for my weapons  I later decided to go a different route with the project.  This early design of a purely energy weapon design bares little resemblance to the mass production base I now use.  I picture it as a laser of some kind.  Chunky and durable its structure is more reminiscent of a prototype than a final field weapon.  But still it would look nice in the hands of soldier.

One of the early hallmarks of 40k and other hard science fiction settings has been the use of chemical and acids as weapons, a tactic our modern military hasn't adopted.  Of course the main reason for that is probably an effective delivery system.  This is my first take on a chemical weapon.  A two part compound sprayer that shoots narrow concentrations of chemicals at the enemy.  I'd imagine it as some form of magnetic acceleration unit that fires chemically infused needles.  Its a fun, 80's sort of scifi weapon.


Of course I can't neglect my newer designs.  One of the major holes in the line has been a rocket launcher. sure I could design a traditional tube style weapon but where's the fun in that.  No I opted for using the gyrojet base I designed for the Battle Cannon.  The barrel is inspired by the rocket launcher from Quake 3, one of my favorite shooters.  It uses a clip of oversize gyrojet rounds rather than a muzzle or breach load design like modern missile launchers. In field this would translate to a more stable, faster firing anti-tank weapon.  And of course it comes with shield and without as well as in a man portable version.

The other new design for the "Advanced" line is a lightning weapon.  here we see the lightning cannon design.  It has a central static transformer and 4 charge emitters around the outside.  Here is the heavy weapon version where we can see its intimidating blade like design.  Though short range and relatively inaccurate it can be devastating to electronic systems.  

The rifle variant of the lightning gun is more sleek with well defined blade like charge emitters  It forms a ball of electrons at its leading edge, building in charge until the transformer cycles.  The result is a devastating  if slow shock blast.

A group of 10 lightning pistols ready for deployment.  I imagine my lightning gun as a short range weapon so pistols makes perfect sense for the design.


Last post I previewed my new Starship Trooper style star marine design.  What I didn't preview were these. These torsos, inspired by Egyptian clothing and the powered armor design of my Star Marines, are intended as the basis for a lighter power armor design. Here we have the female design.  Its slimmer and slightly shorter than the male variant.  Yes it has breasts.  I've never quite understood the hate on female fantasy armor having breasts. Yeah I totally understand they are ridiculously impractical. And yes when treated poorly they are pretty much sexist short hand for "I like gurlz, yuck yuck".  But then I've never had a woman get upset because they have breasts.  Acknowledging sexuality isn't bad and hopefully I've done it without being offensive.

The male variant of the armor is virtually identical to the female.  Its got a clearly male shape.  It's a bit taller than the female variant but not by much.  This design's Egyptian motif is mostly in the mantle that graces its shoulders.  A mantle less design is in the works.  Its a bit more body armor like.

The shoulder pads for my new star marine designs.  Their leading edges are flat making them distinct from other shoulder designs.


The body of the new star marine armor is based off the smaller armor torso's I made above.  The Star Marine torso is completely enclosed. Normally the body would close entirely, here I've made 2 variants of the torso, one closed and the other, shown here, open.  The total figure is designed as an analogue for heavy armored space marine design.  Closed torso figures will stand approximately 44mm tall.  The gap in the open torso should fit any 28mm head once you cut off the neck.

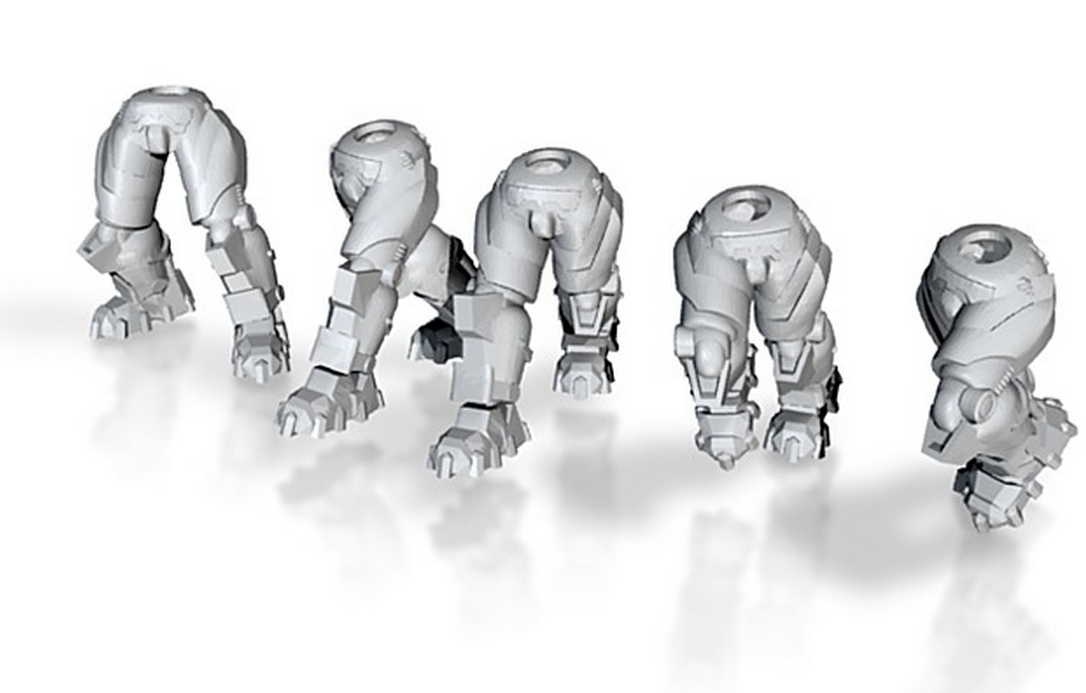
The legs to the most doing to make.  Sure I had the leg design finished when I flashed it last post.  But, the legs proved the most troublesome to upload.  Perhaps it was because of their intricate design, or maybe it was my own incompetence  but either way it took 6 or 7 tries to get them to upload.  Here we have advancing legs.

Well that's all for now, I'll try not to let the next update be a month away. :P Till then, enjoy.

Thursday, January 10, 2013

White Strong and Flexable

I've been on the fense about this for sometime but some recently rejected products have made me decide to do this.  Over the next several weeks I'll be removing White Strong and Flexable (WSF) as a print option from all of my models.  I've repeatedly recommended Frosted Detail for my miniatures designs and even have set the default material on everything to Frosted Detail.  However recently it seems some customers have been upset by the print quality of WSF products they have ordered.  Most notably some of my new weapons.  The poor quality of the print is not the fault of my design or a mistake by shapeways.  WSF is a BAD material for miniatures. Its detail level is not good enough and no amount of polishing will make it good enough.  On larger items the detail can be passable, especially when you want a rustic almost concreat type surface. However, on miniatures that require smooth attention to detail WSF does not cut it.

I use WSF for test prints when determining scale and durability only, I will continue to do so for my own reasons.  But, going forward all models will only be purchasable in FD and FUD only for reasons of quality.

If you are active on the shapeways community I encourage you to push shapeways towards adding additional fine detail materials such as wax or resin and to bring down the cost of fine detail printing.  Until Shapeways offers a better product (like wax or resin) we will have to make do with FD and FUD.

Wednesday, January 2, 2013

How to Make Shoulder Pads


So I promised some time ago I’d show you how to make shoulder pads.  I’ve totally given up on the bell of lost souls contest so I’m just tossing this to my loyal followers on the blog.  I don’t have finished product pictures of my icons which just makes people a bit leery.  Couple that with the fact 3d design is a bit out of reach for the less tech savvy and you get a lot of people skimmed my tutorial but very few commented.  Doesn’t matter I don’t do this stuff to get money I do it because I enjoy it.

So shoulder pads

Now one quick disclaimer.  According to the depositions of the Chapterhouse Studios vs Games Workshop legal battle, Games Workshop claims copyright over the shape of shoulder pads. The judge has ruled in summary judgment that it is possible that GW can own the copyright.  Now this means two things, one that GW might own the shape of shoulder pads, IE a quarter ovoid with a raised rim, and two that CH must yet present evidence that implies otherwise.  Basically the shape of the shoulder pad is currently in contention.  As such if a person makes their own shoulder pads it may or may not be copyright infringement at this time.

Anyway let’s start with a sphere.  I’ve installed a free plugin called SCF Draw Tools.  It allows me to make shapes without the trouble of using the extrude or follow me functions that are normally needed to make a 2d shape a 3d object. Here I’ve started from a center point to make the sphere.


I’ve made the sphere approximately 8500 millimeters in diameter when scaled that will be 8.5mm. 
Of course a shoulder pad isn’t a sphere. Its an ovoid, its taller than it is wide. So we stretch it using the scale tool.  By grabbing the center handle and holding shift we can scale evenly along the axis.  Scaling up my 1.5 times should be about right.


Now obviously we need to break this down.  A shoulder pad is not a full ovoid, its one quarter of an ovoid. So we need to make this a quarter.  Now we are going to do this the hard way.  The Pro Version of Sketchup has these nice Boolean tools that let you intersect or union solid objects.  But I want to show you the freeway to do this. Let’s hope one day Trimble puts the boolean tools into the free version.  Till then we do things the hard way.

So join the ovoid into a group so it doesn’t interfere with the new geometry we are about to make.  And just to be safe lets hide it.  Now with the rectangle tool, starting at the center point of the axis, drag out a rectangle larger than the ovoid. Then use the extrude tool to make it a 3d rectangle. I like to do things in mirror so my shape rectangle only covers 1/8th the ovoid. This lets me modify one side of it and then mirror it down the center. It’s just lazier but it works.


Ok so now we have our two shapes but we need to intersect them.  We can do so by selecting the two objects and explode the two groups. Once they are no longer grouped select them then right click and choose “intersect faces with selection”  Now if we look at it transparent you’ll see the all the geometry is still present. But now where the two shapes overlap there are seems that we want to keep. We just need to delete the excess geometry we don’t want.


We go in with the eraser tool and remove the parts we don’t want.  This process isn’t necessary with the boolean tools in the Pro version but its not really worth the extra cost. There are some free plugins that offer versions of the boolean tools but I’ve never had good luck with them and since I have the Pro version I’ve never needed them.


Now we have the segment of the shoulder pad we need.  But we still need two things, the back needs hollowed to fit the arm, and the front needs a rim around the edge. So lets start with the hollow in the back.  Group the item again and then copy it.  Now use the “paste in place” function to put it back where it was.  Then switch to the scale function.  Using the corner handle scale it down so its slightly smaller.  You may have to play with it to size it correctly.  Once you have it how you want once more explode the shapes and intersect faces again.


Now we have the hollow shape so we can make the rim.  Start by copying the hollowed shape again. Then use the “paste in place” function.  Once you’ve done that use the scale tool just like before but scale it up so its larger than the original shape.


So now we need to take the center of the shape out to make it a rim.  We’ll use the same method we used before to do so.  Make a rectangular 3d object that is again larger than the original shape.  Now select the bottom and vertical edges use the “offset” tool on the side.  Then use the push pull tool to remove the main part and make an “L” shape.  Now we can combine the enlarged pad shape and the L to make the rim.  Once more using the explode and Intersect faces commands we can get the desired result.


At this point we have half a shoulder pad shape.  If we first select the geometry and tap the “control” key while using the move tool we can duplicate the design easily.  Then with the new geometry selected right click and choose “Flip Along” and select the appropriate axis.  Now just drag the geometry together so it is seemless.  At this juncture you can combine the two halves of the main body and the two halves of the rim together.  It’s important to keep the body of the pad and the rim of the pad separate for now.


Now we need to start on the icon for the shoulder pad.  To do so we need a plate that we will cut the icon out of.  We get this from copying the body of the shoulder pad, pasting it in place, and then enlarging it.  Here I’ve scaled the plate using the scale tool so its just slightly smaller than the rim I made. Don’t worry about the overhang at the back and bottom of the pad we’ll deal with that after we make our icon.


Now we need the icon itself.  Remember last time how I said keeping the different layers of the icon separate would be helpful.  This is where it will be helpful.  In this case we have 3 layers.  We are going to use each of these 3 layers as a cookie cutter to stamp out a layer for our icon.


To start put the 3 icons together like you’d want them to display.  Then using the move tool move them so they are centered around the same axis we are using to build our shoulder pad.  Once in place use the scale tool to stretch them so they are tall enough to pass through the shoulder pad.  Now we go back to the move tool.  When you select a single part with the move tool, you’ll see 4 “x” shaped points appear on each face. If we then select one it will allow us to rotate around the center of the object.  Rotate each layer of the icon so it goes through the face of the shoulder pad as shown below.


At this juncture we need to follow the same process we used before. First copy the plate.  Now select one of the icon layers and explode it and the plate. Now intersect with selection and remove the excess geometry. 


Once we have all the junk out of the way make the new shape a group and then paste the plate back in place so you can do the same thing to the other two icon parts.  Her we can see all 3 layers of the icon as their own rounded plate, while working I’ve hidden my shoulder pad body and rim so it’s not in the way.


We can now use the move tool to offset the layers giving them some relief to the design.  Select the layers you want to move, then select the move tool. Now hold the shift key to move the layers along an axis.  Here I’ve move it slightly along the green axis and blue axis to have this result.


Now we have a complete shoulder pad.  At this point if we have followed these steps our pad is complete. This multi-part file should print OK, but for the best results you should join all the faces and remove the internal geometry so its all one piece.  But if we want we can copy it to make multiples pads in a single file. We can rotate it to change orientation and so on.  Here I’ve duplicated the shoulder so it has 10 copies in a single file. Now I can scale it down by 1000% and use the STL export plugin to output it for shapeways.


Here are a couple pieces of advice to help new 3d modelers along. When I was first starting out the biggest problem I had was leaving geometry inside a model.  See when you make an STL and upload it for printing on Shapeways the process will combine each separate group into a “Shell” the shell has to be “watertight” in order for it to print.  That’s a fancy way of saying it has to be a solid 3d object.  Orphaned geometry hanging around either inside or outside a solid object will become its own shell because it’s not connected to anything.  But it’s a shell that can’t be printed because it’s not solid, it has a front but no back.  This means your print attempt will fail.  So it’s always a good idea to double check by going into each group and unhiding everything and removing the orphaned edges you might have missed.   The other problem I consistently had was what many at Shapeways call the “Wall thickness Lottery”.  Each material has specific rules regarding minimum thicknesses it can print in.  Unfortunately it’s very easy to have these thicknesses rejected if they are really close to the limitations.  Be mindful of your target material’s requirements and if necessary ask advise on the forums for guidance on how to resolve the issues you are having.  The shapeways community is quite friendly and willing to help.